 Technology Ltd.")

A hands-on guide to using Blender's Library linking system for managing animations and projects. Starting with generating small shots featuring a red robot, you'll learn to build efficient, reusable environments by mastering Blender's Collection and Library systems. Finally, you'll leverage the linked library to rapidly generate eight unique key shots, then animate them using Video Wan Image to Video.
#25.3
Using Blender in Solo or Small Teams for Creating Animations
Explanation on how I rapidly created the robot using Al (10 mins)
Introduction to the Collection System (20 mins)
Introduction to the Library System Creating a Collection for the robot (10 mins)
Creating a background set and collections (20 mins)
Generating scenes and 8 keyshots using the linked library system of Blender (25 mins)
Generate the 8 shots using Al Image to Video (20 mins)
- Efficient asset management through Blender's Library linking system
- Time-saving techniques to rapidly generate multiple keyshots from a single linked library setup
- Practical integration of AI tools for asset creation and video animation
- Clear demonstration of the Library System → Scene Generation → AI Video workflow
Participants are required to bring their own laptops (please ensure your device is fully charged or bring an external power source).
Software required for the course:
- Blender
Please complete all necessary downloads and installations on your computer before attending.
On-site internet may not support large data transfers, and failure to install the required software in advance may prevent you from keeping up with the course.
Blender is a powerful, open-source 3D creation suite available for Windows, macOS, and Linux. This guide provides step-by-step instructions for downloading and installing the latest version of Blender on each operating system, along with basic equipment requirements.
Basic Equipment Requirements
Before installing Blender, ensure your system meets the following minimum requirements:
Operating System:
-
Windows 8.1 or later
-
macOS 10.13 or later
-
Linux: Any recent distribution with support for OpenGL 3.3
Processor:
-
64-bit dual-core CPU
Memory:
-
Windows: 4 GB RAM
-
macOS: 8 GB RAM recommended
-
Linux: 4 GB RAM
Graphics:
-
OpenGL compatible graphics card with at least 1 GB RAM
Storage:
-
At least 500 MB of free disk space
Downloading Blender
-
Visit the Official Website:
-
Choose Your Operating System:
-
The website will automatically detect your OS and suggest the appropriate version.
-
-
Download the Latest Version:
-
Click on the download button for the latest stable release.
-
Installing Blender on Windows
-
Run the Installer:
-
Locate the downloaded
.exefile in your Downloads folder and double-click it.
-
-
Follow Installation Prompts:
-
Click "Next" on the setup screen.
-
Accept the License Agreement and click "Next".
-
Choose the installation location (or leave it as default) and click "Next".
-
Click "Install" to begin the installation process.
-
-
Complete Installation:
-
Once installation is complete, click "Finish". Blender will now be available in your Start menu.
-
Installing Blender on macOS
-
Open the Downloaded File:
-
Locate the downloaded
.dmgfile in your Downloads folder and double-click it.
-
-
Drag and Drop:
-
In the window that opens, drag the Blender icon into your Applications folder.
-
-
Launch Blender:
-
Open your Applications folder, find Blender, and double-click to launch it. You may need to right-click and select "Open" if prompted about security settings.
-
Speaker Introduction
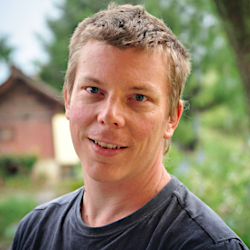
Olivier Amrein
Art Lead of Dreamscape Immersive, 3D/VR Artist
Generalist 3D artists located in Switzerland and working for Dreamscape Immersive. He has worked and has given presentations in the following countries: Switzerland, China, Netherland, Venezuela, Brazil, Russia.
He gives presentations and workshops in both English and French and has pipeline design and TD experience.
- Ticket holders may register for the priority entry queue to gain earlier access to the classroom sessions.
- If you wish to join, please login to the Origin CG Ticketing and go to [Tickets] > Your Ticket > Courses > Register to complete your registration.
- Participants who have not registered in advance may still enter through the regular queue, but those in the priority queue will be admitted first. Seats are limited and available on a first-come, first-served basis.
- Event times and content are subject to the official schedule published on the website.
- The organizer reserves the right to modify the event time, content, and arrangements without prior notice.
- In case of any dispute, the organizer reserves the right of final decision.